Project Renovation: Before & After - Master Bath

...drum roll, please!....

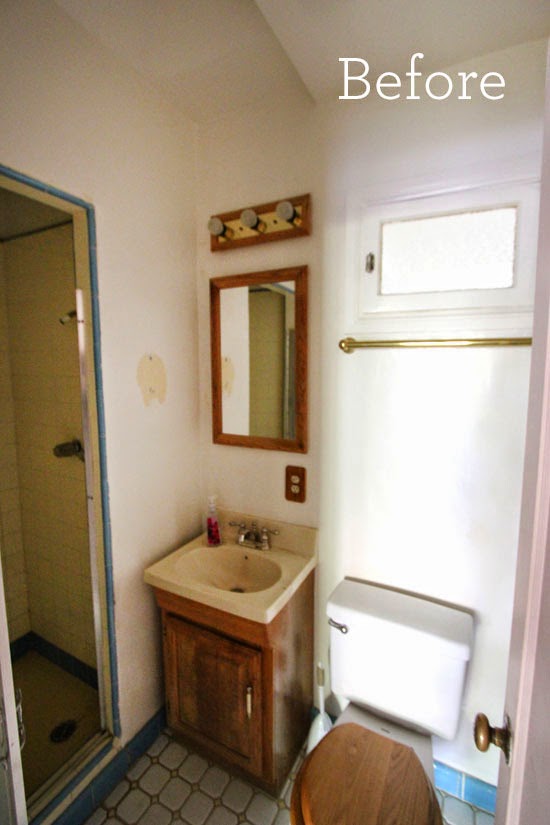
I present, my master bath before:

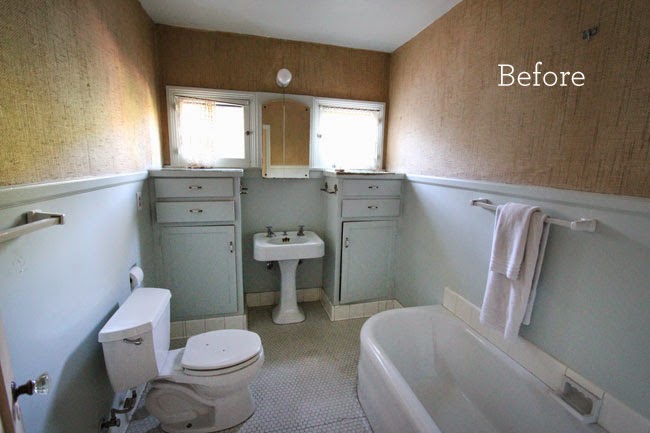
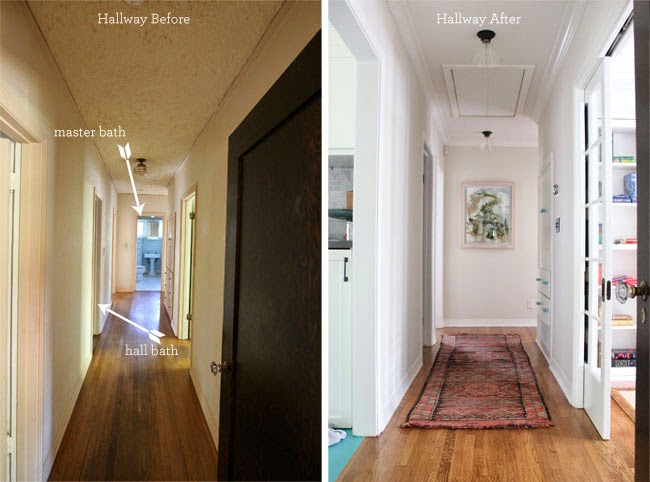
A word about the before. I really loved this bathroom. Like, really loved. I wanted to keep everything and just spruce it up a bit with new paint & wainscoting, but when it came down to the renovation of the rest of house, it was obvious several things had to happen. It was almost like a domino-effect {another reason to fully plan out ALL your renovations before work starts so you don't have crazy change-orders. Contractors love & hate change orders. They make more money on them, but it usually involves more time and effort. Both are bad things for the holder of the checkbook}. I'm guessing the house only had one bathroom when it was built. Naturally, the bathroom had it's door in the hallway so everyone had access. I think the 2nd bath was added some time later, also with access from the hallway. This resulted in 2 bathroom doors about 10 feet from one another. Since I was recapturing kitchen space by moving the hall bath and making it an official "guest bath", it was only logical to close off the door into the back bath and create a Master Bathroom. Hel-lo Master Suite! Woo hoo!

(PS. Don't you just love the old yellow walls with pink trim? So groovy... Not.)

--

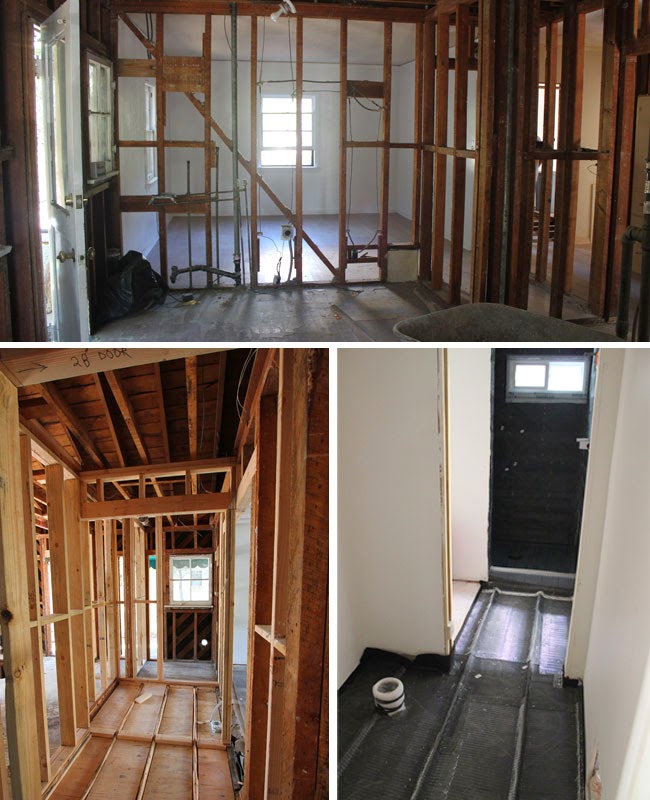
Because of where we were putting the new doorway and the space constraints, I was super sad that the awesome built-in cabinets had to be removed. I was hoping that I'd be able to save and relocate them to the other wall. I was informed after demo {which I kick myself for not being there and helping/supervising} that it was too damaged in the removal process to save. {my totally irrational subconscious was stamping my feet like a 3 year old, screaming "those lazy, oafish demo guys!! They tore it out because they didn't want to take the extra #$*%!* effort to remove it gently!!!!! AAHHHHHH!!!!"
Of course, I have no evidence of this.}

Also, the beautiful porcelain hex tiles had to be ripped out because there was a huge crack in the middle of the floor {I'm assuming from an earthquake or the house settling}. Also with the relocation of toilet, sink and cabinets, there were several holes that would be difficult to match new tiles & grout without looking patchy. I was also hoping to turn the original cast iron tub into a tub-shower - as much as I would love to take baths every day, it's not super practical. Naturally, with creating a shower, I would need a tile surround to prevent water damage & flooding while I took a shower in said tub-shower. Small detail. All said and done, where I thought I'd need minimal work, I ended up with a totally gutted bathroom.

*sigh*

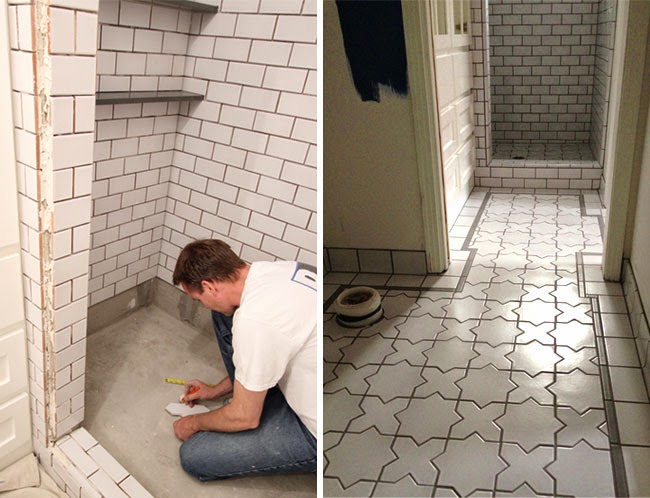
So, work continued while I tried frantically to find tile, a new toilet {I was also planning on keeping the two original toilets, but on closer inspection and some rational thinking, they were both quite gross}, a medicine cabinet, a new sink cabinet, and fixtures to tie it all together into a cohesive unit.

A win for me: I managed to save my original tub. My contractor thought I should get a new tub because the original one had some rust spots around the drain and faucet area. Really not that bad in my opinion... it's just so cute and has a really pretty curve on the sides. I couldn't bear to get rid of it {besides! It's ORIGINAL and CAST IRON. I mean, come-on. Not only that, but a new cast iron tub is at least $1200! I'm not a fan of acrylic tubs. Cheaper yes, but no plastic tubs in my house, thank you very much}. After my insisting, my contractor found a little old man who reglazed it for about $250 and it looks brand-spankin' new. Winning!

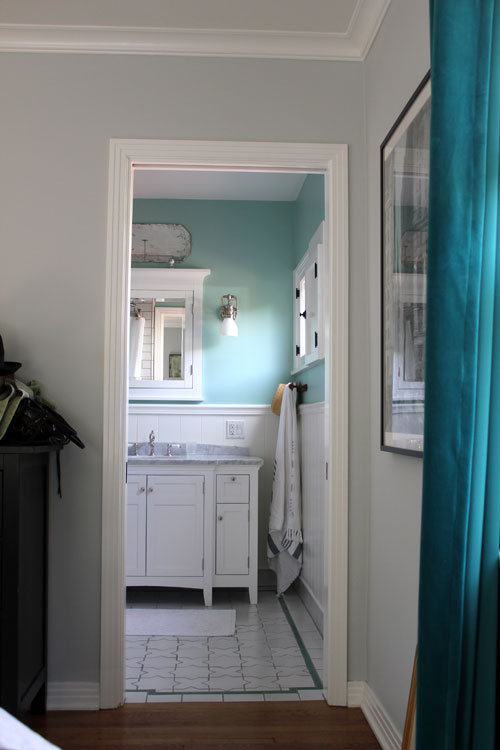
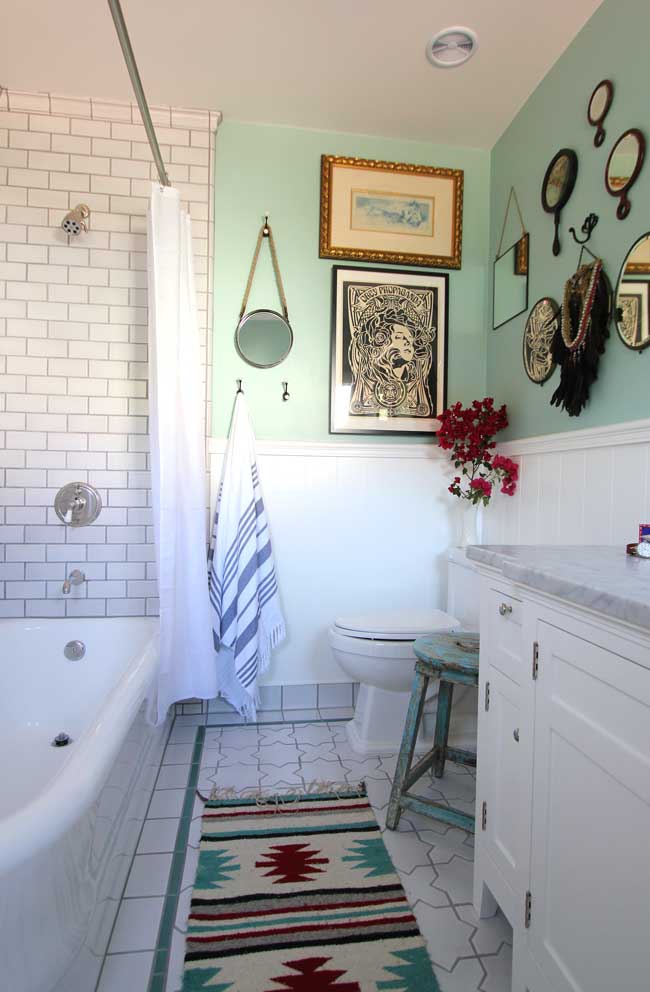
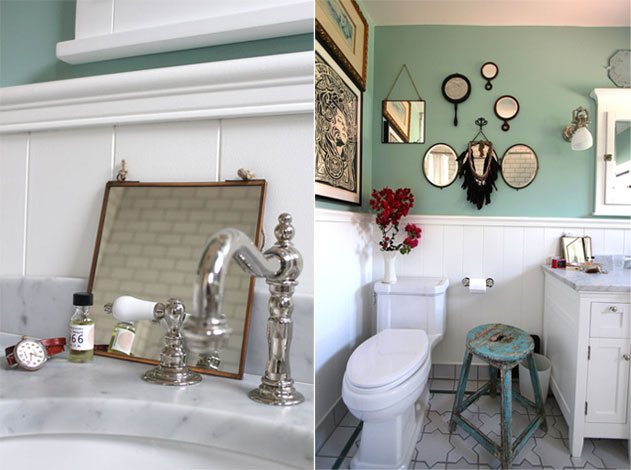
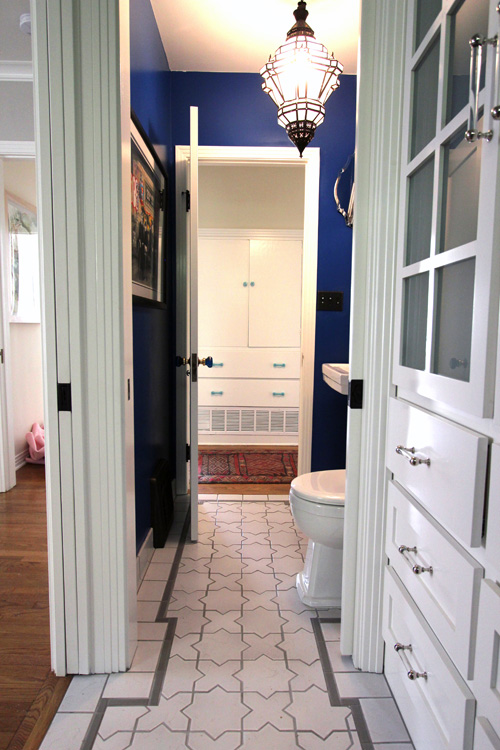
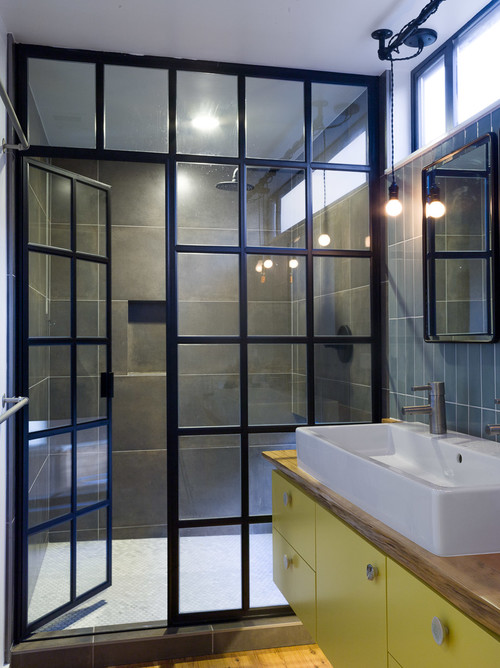
So, without further ado, here's my new Master Bath!

Project Renovation: Before & After - Hall Bath

So, yesterday I gave you a little peek into the process of the hall bath. Now, I give you the final results of the hall bathroom! Yay! 
As a refresher, here's the before:

And, here's the after:

 The mirror above the sink is original to the house & relocated from the master bathroom. Lantern pendant is from Morocco. Shelf: Pottery Barn. Sconce: Restoration Hardware. Tile: Fireclay Tile. Pedestal sink & toilet: St. Thomas Creations. Wall paint: Dunn Edwards high-gloss in "Deep Sapphire". 

Project Renovation: Hall Bathroom

With a shiver & a ghastly hiss, I give you.... the Hall Bath...

There is nothing nice I can say about this bathroom. Not only was it taking out a sizable chunk of the kitchen,  the toilet was so large that the door smacked the bowl when you tried to enter. The shower was leaking a steady drip accompanied by a petri dish-like floor growing happily in the dim dampness. The sink was molded fiberglass awesomeness. It was even outfitted with a super stylish light fixture, a la Vegas dressing room.

No question. It had to go.

I'll have to show you a floor plan so you can better understand the maze that was my house.

{Apologies for the horrible scan quality}

 On the left we have an utterly complicated mess. On the right, a clean and simple with flow. Like a breath of fresh air.

So, now you know exactly what's going on, here's what happened in a lightning fast 3 image summary... remember, I was out of town for most of this {and again, leaving town is NOT ADVISED}

Looking back, it's kinda crazy the amount of work that was involved with all this.

All the tile in the bathroom is Fireclay Tile. I loved my tile, but unfortunately it took FOREVER to come in.  Usually it takes around 6 weeks. They make amazing stuff and since everything is handmade there can be inconsistencies. They had to completely remake a portion of my order because the quality wasn't up to their standards. So, that tacked on another 2 weeks. So we waited. Finally, it came in and the installers got to work. They were also nice enough to put up a couple of Ceasarstone shelves in the shower that I had made from scraps of the kitchen countertops.

As I've no more mula, dinero, scratch or dough to spend at the moment, there is no shower door. It will be coming later. Because, of course, I have Grand Plans. And naturally, Grand Plans are expensive! Beeeecause, I want this awesomely amazing wonderful style of shower door:

See? Grand Plans. Stay tuned! The final before & after pics of the hall bathroom is coming tomorrow!

If you'd like to see my bathroom inspiration board on Pinterest, here is is.

Project Renovation: Design*Sponge Feature!

 Check it out, everyone! Such exciting news, my house interior was featured on Design*Sponge a couple weeks ago! Many thanks to the super nice Amy Azzarito, Grace Bonney, and all the readers & commenters on the site {and on Instagram} for all the support and lovely words! I've still a lot of decorating & finishing touches to do, and will be adding more detailed posts about the renovation process soon! Renovation been a whirlwind and oftentimes maddening, but one thing's for sure: All said and done, it's all worth it! {my pocketbook may beg to differ, tho}

Check out the full D*S post here

See more of my Project Renovation posts here

Project Renovation: Big Reveal: Kitchen!

If you know me or have been following this blog, you know that my house has been consuming most of my life for the past year-and-a-half.

{gulp}

From the moment I put an offer on it, my life has been a constant roller-coaster of events. I closed on my house the day before Thanksgiving and my contractor started demo the following Monday. A project that he said would take 3 months. "We'll have you moving in here before St. Patrick's Day!" he said. Yeah. Right. I may have gone out of town in a series of crazy, once-in-a-lifetime crazy-to-pass-up type trips: a month in Africa, a week in Hawaii, and 10 days in Cuba. That January through March was just insane. Amazingly awesome, but insane. Mental note for any of you thinking about buying and/or renovating a house. Do NOT go out of town until the process is over.

So, anyway - here is the before of my cute, but awkward kitchen with virtually no counter space.

*cue the drumroll*

I present.... my kitchen!! *ta-daaa* 

{audience ooh-ing and ahh-ing}


Project Renovation: Kitchen Floor

Here I'm going to attempt to illustrate the craziness that is my kitchen floor. After pulling up about 3 layers of burlap-backed linoleum & a layer of 90-year old tar/glue, I was left with  beautifully untouched original flooring. If you remember (and much to the horror of my contractor), I had the unwavering desire to paint my floor. *Gasp!* in total incredulity he says, "You want to paint your wood floor?!" Seriously. I don't think this man has EVER picked up a home decor magazine or even knows the word "blog". He even asked me to send him a link that would show how to properly paint wood floors. I obliged, knowing full well he was never going to read it. He's a do-er, not a dreamer. So, whatever. *shakes head in dismay* Contractor painting floor was out. 

Thinking that maybe Flooring Guy would be able to take care of it, because after all, he is Flooring Guy. He smiled and said, "I've never painted a floor. But, sure! No problem" 

*Mistake! Red flag! Red flag!*

So, no. Flooring Guy did not paint the floor. I had him sand the old tar/glue & renovation crud that had built up. He got it down to a bare, smooth-as-a-baby's-behind state. Then we covered it in about a billion layers of paper for protection. Remodeling continued. 

Later, I thought maybe Painter Guy could do the floor, because after all, he is Painter Guy. He smiled and said, "I've never painted a floor. But, sure! No problem" 

*Mistake! Red flag! Red flag!* 

So, no. Painter Guy did not paint the floor. None of "my guys" could paint the floor. No one even knew how to paint a floor (or were just afraid). I couldn't trust any of them. I got seriously depressed. Then, I had a thought. I got excited...

Hand on hip, finger to the sky and in a voice worthy of a superhero, I bellow; "I'll do it myself!"

In hindsight, I think maybe I got "Pinterested" (to quote my sis-in-law). By grabbing inspiration and crafty awesomeness from Pinterest, one thinks one can accomplish anything in 2 days and have it turn out worthy of an  Architectural Digest photo shoot.  Not always possible. So, of course, a DIY Painted Floor weekend was easily within my grasp. Totally! No problem! I even had the brilliant idea of using different colors for each coat, so as it wears down over time, it'll look way awesome. Mom, being her super rad self, offered to help. (or maybe I begged, pleaded & bribed her with a lifetime spa membership. I'm not sure) My kitchen is just a big square, so taping off & painting shouldn't take too much time.  Right? Wrong! I forgot about my sweet new custom cabinets that we'd have to tape around. In, out, in, out, around the legs, under & in the cabinets... ugh. After pulling up all the protective paper, vacuuming & taping off, Mom and I had shimmied around on our bellies all day long. (knees, elbows, back = oh, the pain!)

Second layer. Oh, the beautiful white floor. Sooooooo amazingly awesome. Sad to cover it up, but I knew with my life, there was no way I'd be good at keeping it looking clean & pretty.  *sigh*

I wanted to add in a little bit of detail without going overboard with an all-over stencil pattern. What can I say, I'm a little fickle and I knew that I'd get tired of anything "big" I put down. So, I decided on a simple border stripe where we'd tape off the white and paint over with the turquoise. Fingers crossed that the tape would hold up to 2 coats rolling over it.

Commence OCD time! I became one with my Xacto. Serious measuring, penciling, measuring again. Taping, cutting, taping, cutting.

Below, you can see the tape peeking through the first layer of turquoise. 

It started puckering in spots, but overall there wasn't much touch-up needed later. Taking an extra half-day to touch-up? That was just me being OCD. Eventually, I had to say it was done.

All said and done, between taping time, drying time between coats, and fixing mistakes afterward, it took us about 7 days. All the paint was Rust-Oleum Deck Paint from Dunn Edwards. Layer 1: "Mint-o-licious". Layers 2 & 3: "Whisper". Layers 4 & 5: "Caribbean Cruise". Layer 6: clear polyurethane (professionally applied by Flooring Guy) .

Lots and lots and lots of effort that was well worth it in the end. Thanks Mom!!!!

.